

Having well organized and easily accessible craft supplies helps me to quickly get started on DIY projects without having to begin by wasting time sorting or searching for materials.
Take bobbins, for instance. I used to keep them all thrown together in a small box. But the thread would unwind and get all tangled as I searched for the one that I wanted to use.
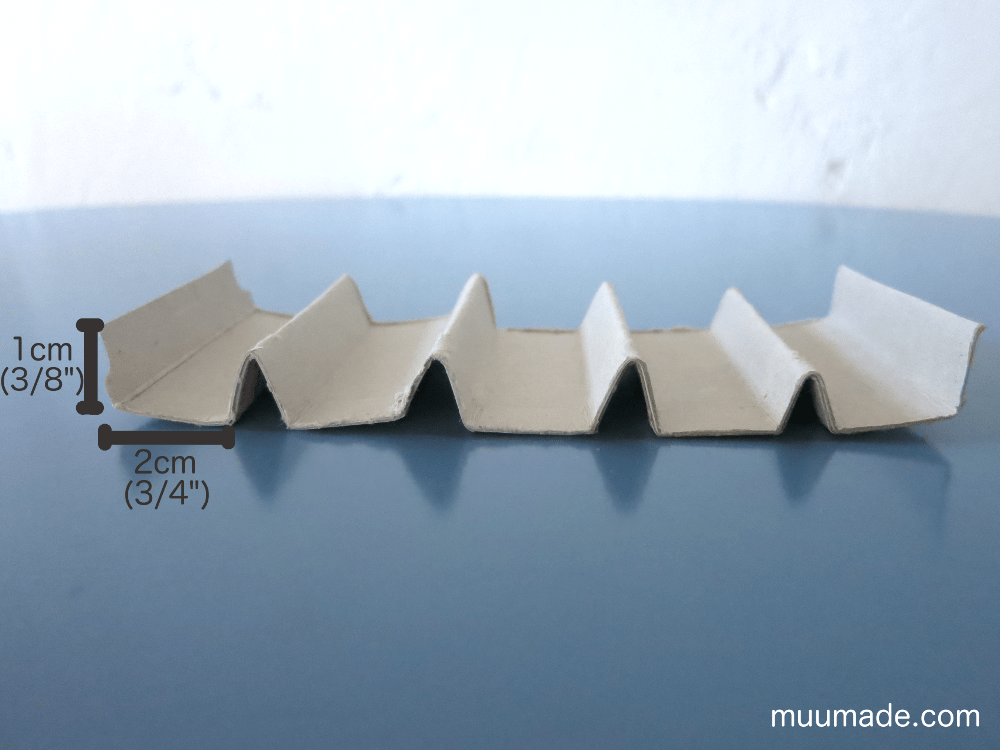
So, I decided to organize the bobbins to prevent them from rolling around. Of course you can buy bobbin storage cases, but you can also make a divider very easily with a thin sheet of cardboard cut from an empty tissue box.
My bobbins are Class 15; they have a diameter of approximately 20 mm (3/4″) and are about 11 mm (7/16″) wide. Therefore I made folds in the cardboard to create 1 cm (3/8″) high partitions every 2 cm (3/4″), as shown above.
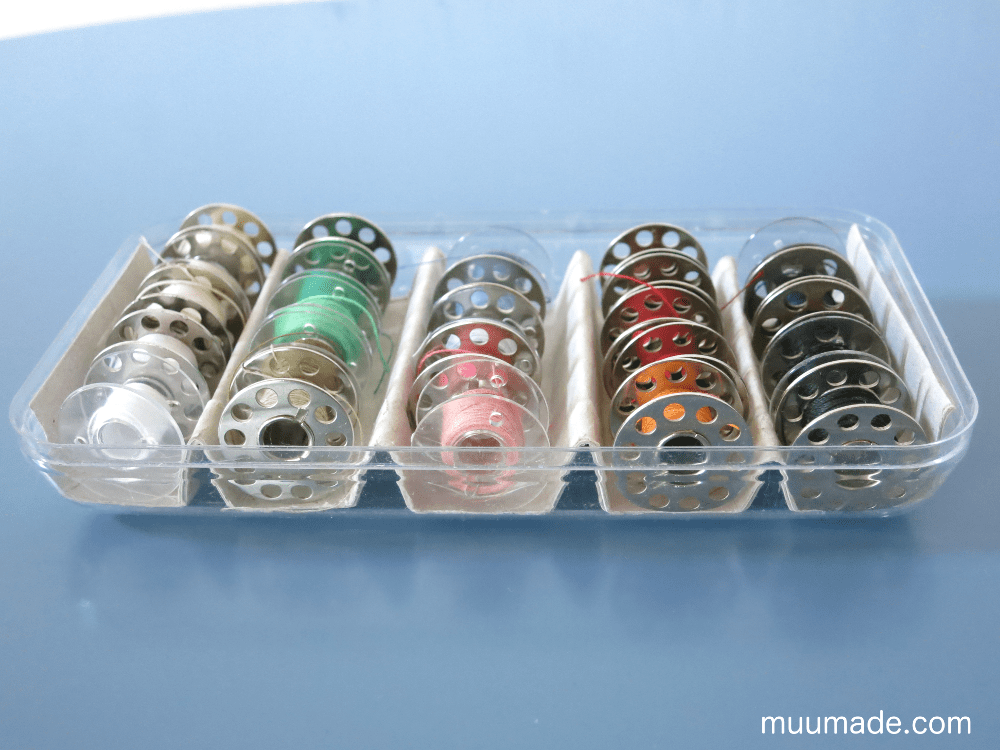
The overall size of the cardboard divider depends on what you will use as your bobbin container. I reused a plastic lid from a bonbon box, which is perfect to fit five rows of five of my bobbins.
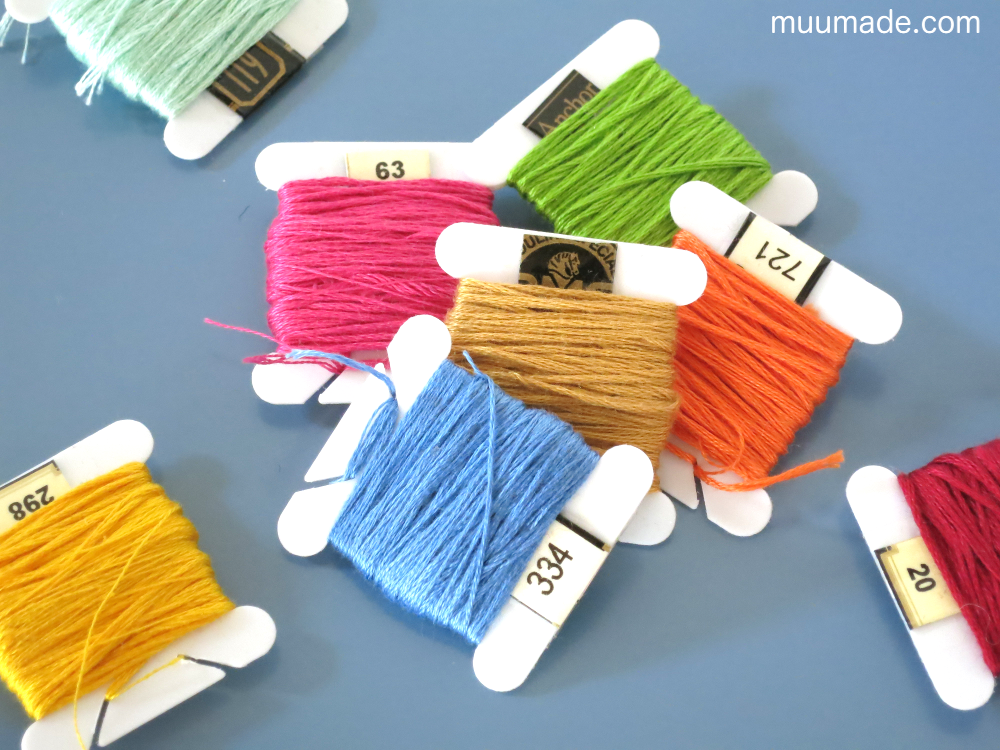
Organizing your embroidery thread is another much recommended task!
There are lots of possibilities… For example, if you have some clothes pins handy, you can use them as bobbins and wind your embroidery thread around them. Or you cut thin cardboard sheets into thread cards, like the cute bunny shaped cards that I found on Pinterest. I use ready-made plastic thread cards, shown in the photo, because the owner of a local sewing supplies shop generously gave me a pack of them when we had a conversation about how to organize embroidery thread.
To give you an idea of the size of these thread organizers, the plastic cards that I use are 3.5 cm (1 3/8″) by 4 cm (1 1/2″), and I find them to be a perfect size.
Regardless of what you decide to use to hold your thread, I recommend that you cut out the brand name and color code of each skein and tape them onto its card or spool. (That way, you will know exactly which colors to buy when you run out of them!)
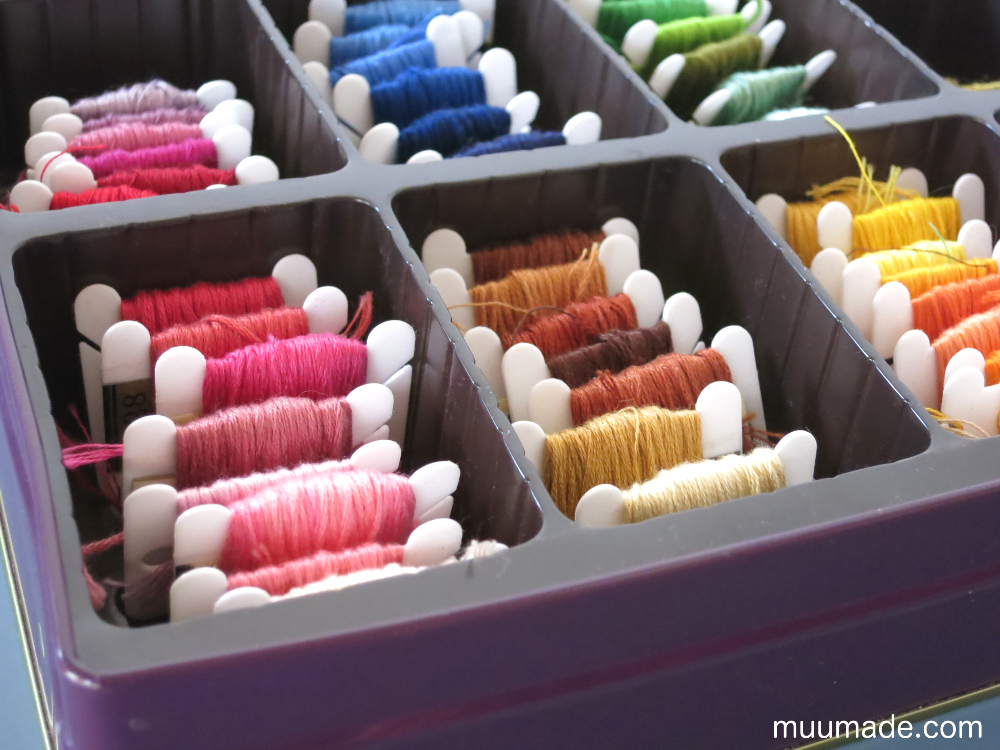
For even easier access, I recommend that you find a storage case with dividers to sort them by color. I recycled a large cookie tin, which conveniently came with a plastic insert of almost exactly the right size!
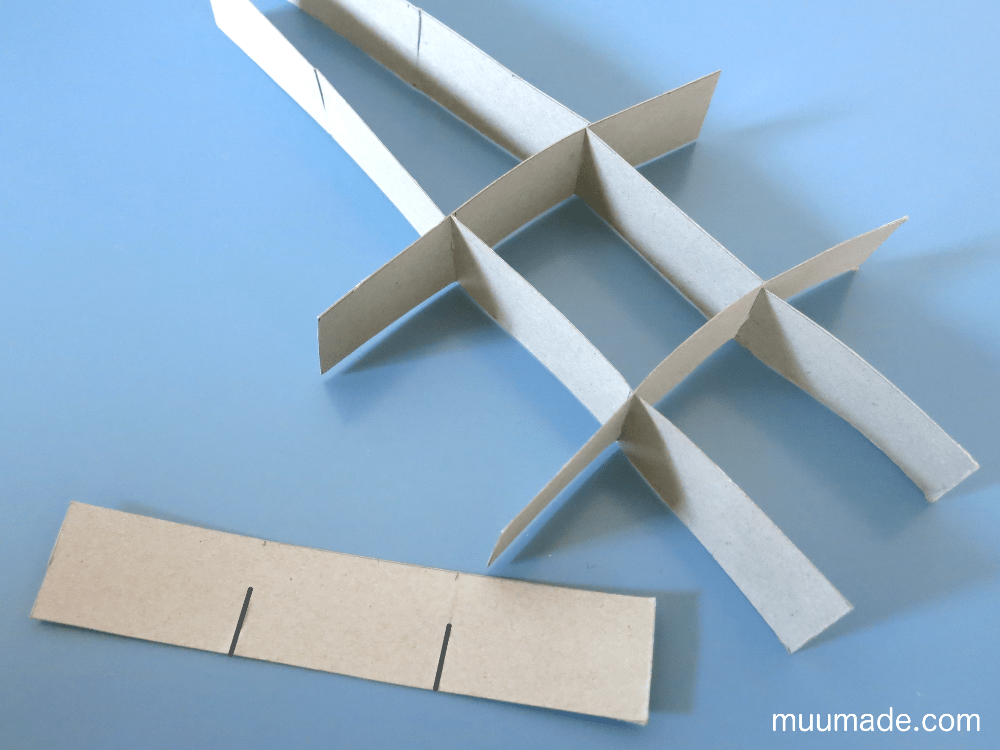
If you do not have a ready-made divider, you can always make one yourself out of cardboard. Simply make a few strips of cardboard and add cuts where you want to cross them to produce a grid.
Once you have your thread nicely organized and readily accessible, you can tackle any sewing project anytime you are in the mood!
If you would like to share an image of your organized craft supplies inspired by this post in social media, please tag me @muumade.
Thank you, and happy organizing!